Sub-Zero Gasket Installation Guide How To Video:
If you have come here thinking a gasket install is a simple task, think again! If you think you aren’t capable of doing this, do not bother and call someone who says they are capable. If you are handy, read on, and have patience because this is a tough one! If you want us to put your Sub-Zero Gasket on your door, give a call and we will do it today.
I love working on and replacing Sub-Zero Gaskets. They really are a challenge and as these beautiful units get older, we get more and more calls about replacing gaskets. Since it is just a rubber seal with some bolts attaching it to a door a lot of customers try to take it on themselves, which we love to see. However, the truth is that a Sub-Zero gasket installation is no walk in the park. It takes skill and patience, and a lot of it. Check out the guys at Appliantology and their helpful guide. Now, lets talk about replacing a gasket on a Sub-Zero 300, 500 and 600 series door.
When To Replace a Door Gasket on a Sub-Zero
We get a ton of calls from people who think that their refrigerators issues can be fixed by changing the door seal. This is false, the door seal is dependent on an efficient working refrigerator. The door seal gets better when the machine is at temperature and if the machine is not reaching the desired temperature or efficiency, taking a door seal off a warm door is a recipe for disaster. SO, if you think that your door gasket swap will magically fix your broken sub-zero, please do not attempt this, call a professional, get the machine checked out, if you have a cooling issue you need to have it fixed before attempting this. If you have no service or error messages, and no concerns what so ever of the efficiency of your sub-zero, read on.
Reasons for a door gasket change that we see
- Very torn gasket (cosmetics)
- Hard or brittle gasket
- Moisture accumulating where gasket is torn
- Excess moisture in box
- Slightly extended run times
- Machine Frosts up on the evaporator constantly and sealed system is ruled out (more likely a sealed system or thermostat issue)
Step One – Warm up the gasket and get the right shape

The first and largest problem is that the gasket comes out of the box all folded up. Sometimes when the gasket has been in the box for a long time the kinks will be worse. While it does have “memory” of how it should sit, if we try to install it with all these kinks, it will never work. This is only a problem if you try to install it like this. Sub-Zero says remove the gasket from the box and to use a hair dryer on the areas with kinks in them. We did this for years but there are a few better ways to attack this.
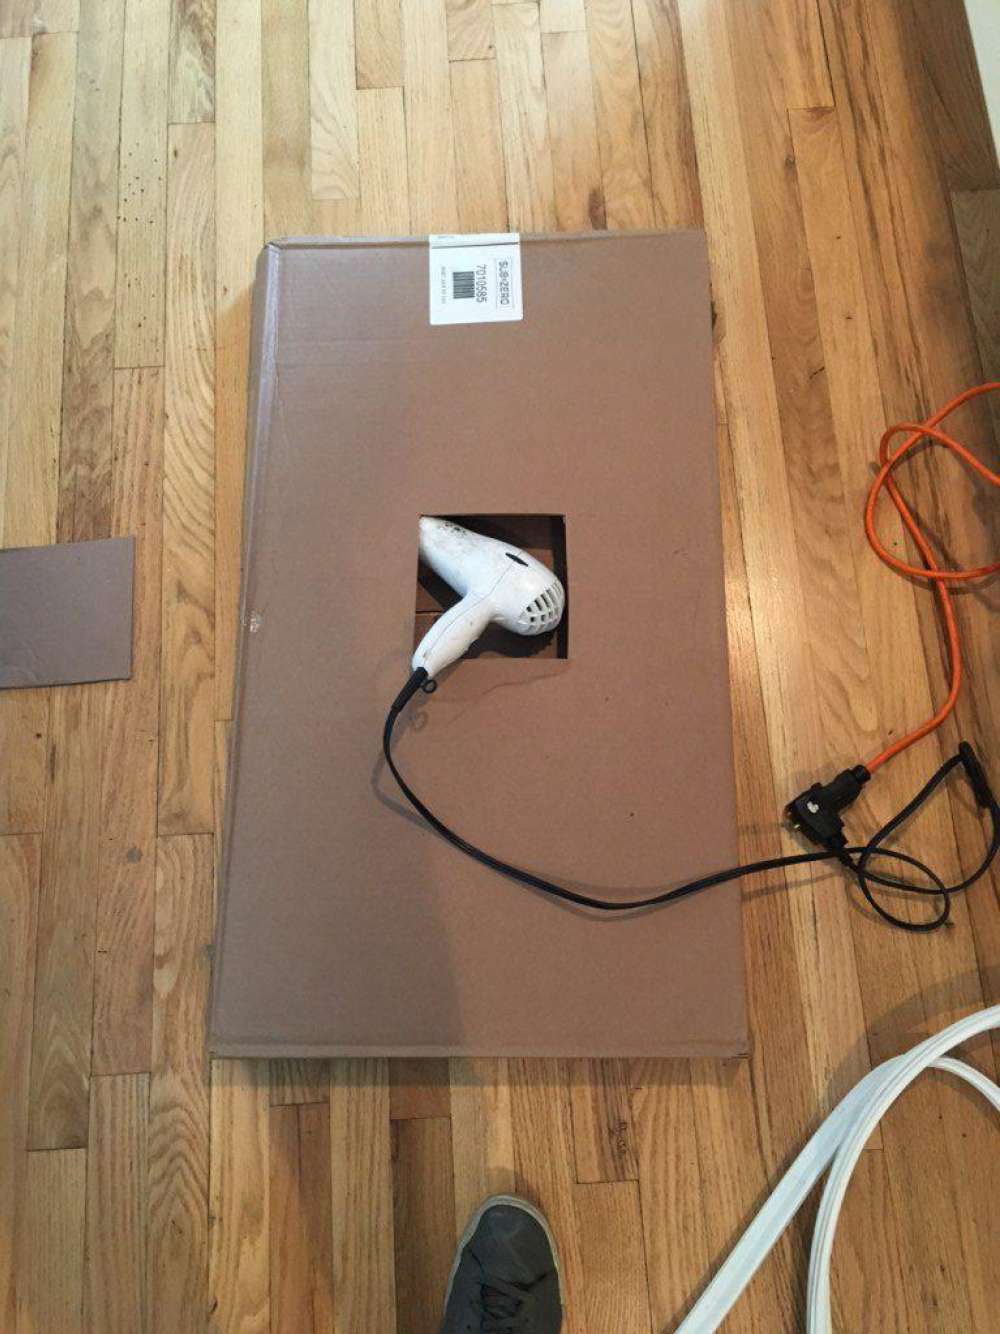
Method One: Do not open box fully, cut hole in middle of box, put blow drier in hole. Allow 15 minutes on the warm setting of your blow drier to evenly heat the contents of the box. Open box, remove gasket, place gasket on floor stretched out as if it were sitting on the door of the unit. Allow to settle 15 minutes. If irregularities exist, use a blow drier to heat those areas and mold them back into place with your hands.
Method Two: Give the gasket a warm bath in the sink. Not a scolding hot bath. Keep the gasket submerged for a few minutes. Lay the gasket out on the floor on some towel like it would go on the unit. It should be straight now, not twisted up or disfigured. Pat it dry with towels, it doesn’t need to be bone dry before you start to put it on. This method can be wet and messy and we rarely use it, however it does work wonderfully as it ensures even heating around the gasket.
Start Removing the old gasket from the door.
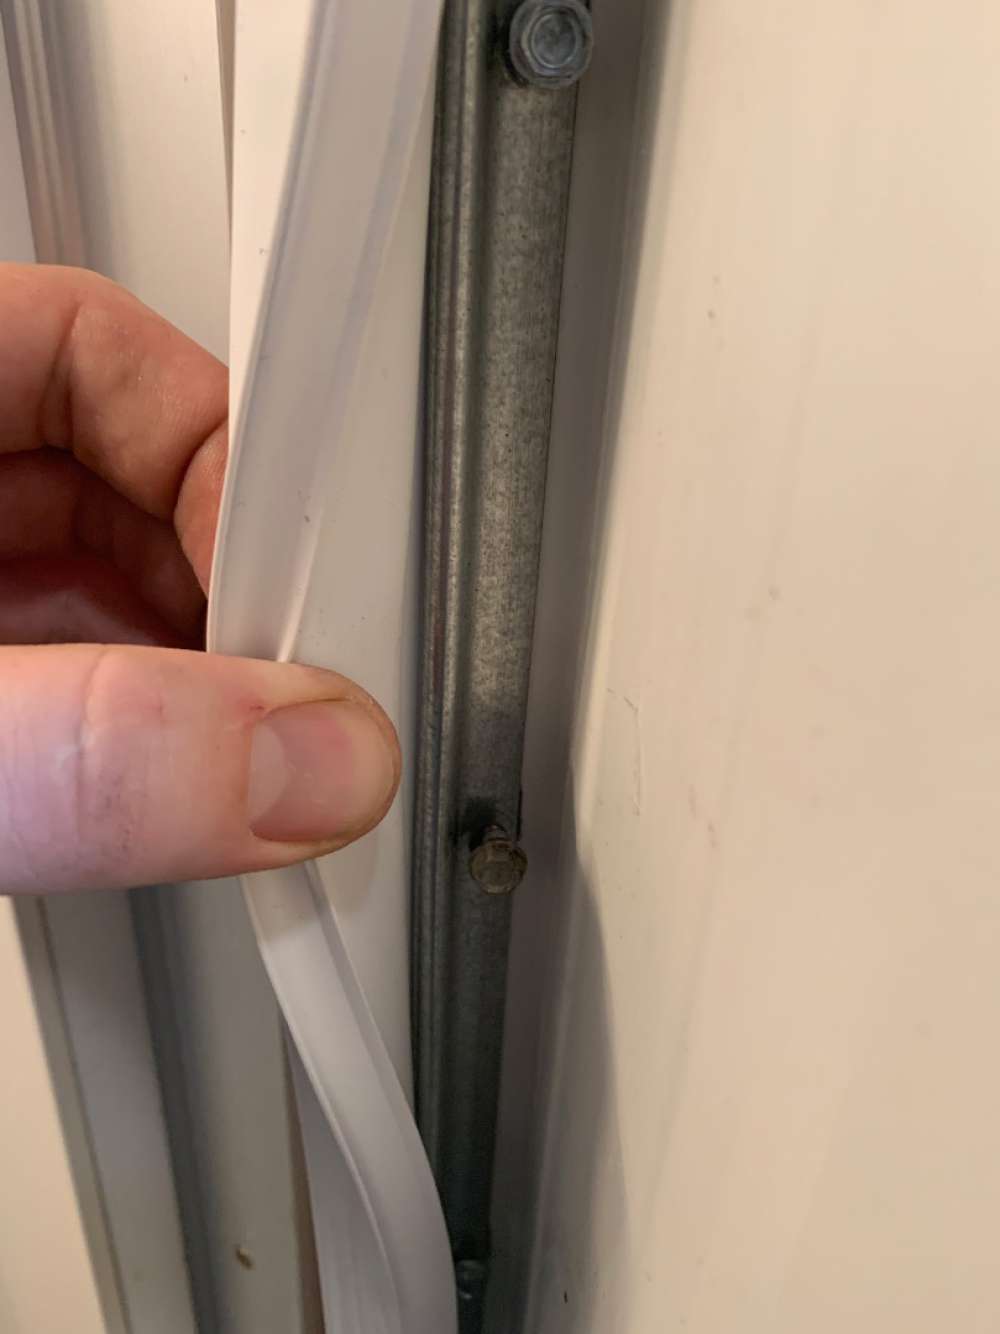
I do this in sections and I always start at the top and work my way down. Do not remove the full gasket,rather remove sections of it at a time. I try not to even remove the metal strips that hold the gasket on. Instead, I remove a few of the bolts but loosen the rest evenly across the whole strip. Once loose, The old gasket should be able to be pulled out and the new gasket slipped into its place. Check out this picture to the right to see what I mean. I do not remove the metal strips, I remove a few bolts and loosen the rest. Now, with a little bit of force, the new gasket should be able to slip right behind the metal strips and into place.

Don’t tighten bolts yet!
Now you should be getting the hang of it. Remove some bolts, slip the new gasket in, put the bolts back in, don’t tighten them, we do not tighten the bolts fully until the end. Right now they are just being tightened enough to keep the gasket in place on the door. Work your way around the door slowly. Peel off the old gasket a few feet at a time, slip in the new gasket, lightly screw in bolts so it holds onto the gasket.
The Lip of the Gasket Must be Seated in the Metal Strip.
When you are slipping your new gasket into the metal strips you will realize that the metal strips have a little groove where it holds onto the metal bead on the gasket. This is the lip of the gasket and it is important to have it situated nicely in the metal strip. You do this by getting the gasket in place and pulling on the outer edge (thick part) of the gasket. Look at the picture to the left to see an example of what I mean.The bolt should be loose enough that when you pull on the gasket it gives, but tight enough that when you pull it doesn’t pop out. If it pops out, get it back in the metal strip and try again.
Get ready to tighten the Bolts.
This is where it is critical to make sure your gasket is seated correctly. Look at the corners of the doors, I bet you notice lots of slack here. That is okay because all of your bolts are relatively loose. If there is extra slack at the bottom or top, you must move the gasket with your hand until the slack is gone and distributed equally amongst the door. With your hands you need to make sure the corners look nice and tidy, they should be tucked in and closely hugging the door frame. Look at the image below to see what I mean by a bad installation vs a good installation. Once we are in the “good position” and everything is tucked in neatly , we are ready to tight the bolts.

Tighten the Bolts, Don’t Over Tighten the Bolts!
Everything is tucked in, the gasket is looking pretty. Lets start to tighten the bolts, don’t over tighten them or they will strip. If they do strip, and they are not tightening, get some silicon, fill the hole with it and insert screw back in, just to make it air tight. Make your way around the door. Make sure there isn’t too much slack in one place or another. Tighten those bolts! Patience, keep checking for slack. Almost finished. Once complete, the door should close just as it did before, If it needs an adjustment you can check on top of the door to see your door hardware, adjust by loosening and moving door, this is not necessary if the gasket installation has gone to plan . Check out the photo below for a nice looking installation !

